
|
||||||||||||||||||||||||||||||||||||||||||||||||
|
Home Intensive Gardening TechniquesLearn techniques which will allow you to grow more vegetables where space may be limited.
For some people, a small-sized garden is preferable to a larger one. Smaller gardens require less labor and expense than larger gardens. Decreasing garden size provides more yard space for other activities. The gardener can concentrate soil improvement efforts in a smaller area, and, with careful management, small gardens can produce sufficient vegetables for fresh eating during the growing season, and perhaps extra produce for preserving.
ConsiderationsFor some gardeners a small garden is not practical. If you are interested in preserving, a smaller garden may not provide enough produce for winter use."Intensive" gardeners must pay close attention to scheduling plantings to ensure that no part of a smaller garden is left unoccupied. Some growing seasons can complicate trying to stagger plantings. Smaller gardens also require careful management. Growing plants closer together demands particular attention to pest control, fertilization and training of plants. To grow all the vegetables you want, you may have to use transplants instead of direct seeding, which will increase your costs. To manage smaller gardens successfully, gardeners must use different growing techniques. These can include bed planting, vertical growing, interplanting, and succession planting. Growing vegetables in containers is another type of intensive gardening and is described in Container Gardening .
Raised BedsRaised beds are growing areas whose surface is "raised" above the surrounding area. Raised beds can be temporary or permanent. Once established, the garden traffic is confined to paths, which reduces soil compaction. Soil improvement efforts are focused on the beds alone, not in the paths. Raised beds warm faster and dry earlier in the spring, allowing earlier spring planting.P.S. I tried this in Arizona, for instance... BAD idea!
Disadvantages of Raised BedsRaised beds are not the answer for all gardeners lacking space. The initial labor and cost to establish the beds may be high. Once established, especially with permanent "sides," it may be difficult to use a standard size plow or tiller for cultivation. The tendency of the soil in raised beds to dry faster may increase the need for irrigation later in the season. Also, not all types of vegetables grow well in bed culture.One of the better things I did when I lived in the desert was put a drip hose in the beds of vegetables that needed the most water. That was a boon! And to think I could have saved myself all that trouble by NOT using raised beds in the first place! ARGH.
Types and SizesRaised beds can be free-standing or built with more permanent sides to help hold the soil in place. You can first outline your freestanding beds by marking out a tilled area where you intend to make your beds. No need to till the path ways.Make beds any convenient length, but not wider than four or five feet across for easy reaching from either side. (I guess it really just depends on how long your arms are!) Once marked, you can use a hoe or rake to move soil from paths up into beds. Make freestanding beds no higher than eight inches or they will dry too quickly or be washed easily by rains. Finish by smoothing the top of the bed with a rake. At least if you like things neat and pretty like I do! Here is a photo of my Uncle's garden from this spring... notice the two different raised bed techniques.... (click on it to make it bigger!) The beds will settle some through the growing season of course. To prevent excessive drying and washing of soil, mulch (mulch, MULCH!!) the sides of the beds with an organic mulch like straw, leaves or grass clippings. Anything you can throw in a compost pile, you can use for mulch. Permanent raised beds have supported sides. A variety of material including wood or concrete blocks can be used for the sides. Redwood or western redcedar of at least two-inch thickness are long-lasting, or you may use pressure-treated wood. DON'T make the same mistake I did! I got a number of railroad ties for free. The creosote they use to soak those things is really toxic. And it takes forEVER to stop leaching out into your soil! See below...
Certain wood preservatives can damage growing plants. Avoid materials which have been treated with creosote or penta (pentachlorophenol). Old railroad ties have been creosote-treated, and may contain enough residue to cause plant injury. Safe preservatives include salts of copper, chromium and arsenic (indicated by combinations of initials like CCA or CAC) or by trade names like Osmose and Koppers. Woods treated with these materials are greenish in color. The wood should be pressure-treated for the longest life. Use care when handling treated wood. Always handle it with gloves, and wear a mask while sawing it to avoid absorbing any of the preservative residues. Dispose of scraps and sawdust in a landfill. Do not bum scraps or use sawdust in the garden.
Once the sides are installed, fill beds with garden soil which has been amended with peat, shredded leaves, compost or other organic materials. If you get the soil from an unknown sourse I would strongly urge you to have it tested first. I once bought four ton of topsoil and it took me two growing seasons to get it balanced in a way that would allow ANYTHING to grow in it! Live and Learn! Since these beds will be in place a number of years, building up and loosening it's soil when first establishing the beds is important. Properly amended raised beds will have soil loose and friable enough to be turned easily with a shovel. Old mulch, compost or other organic material can be turned under each year which will further enrich the soil. You also can organize your garden into beds, but not actually raise them. This is a good option for gardeners with sandy soil that would dry too quickly if formed in raised beds. Beds are a more efficient way to organize the garden than rows, especially for small-sized vegetables. By establishing permanent paths and beds (even if they're NOT raised) you still will avoid compacting the soil in growing areas. Most crops are adaptable to growing in beds, but small-sized vegetables like lettuce, greens, dwarf or bush varieties and cabbage perform the best. Root crops like beets and carrots also will thrive in the looser soils of beds.
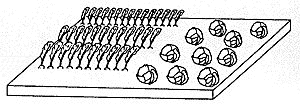
Figure 1. Ideas for spacing vegetables in bed plantings. Whether raised or not, the advantage of beds is that vegetable plants can be grown more closely together. Space plants by thinning or transplanting so they are evenly spaced in the beds. The spacing should be whatever the seed packet recommends for spacing between plants. For example, if the seed packet says to thin lettuce so plants stand six inches apart in rows two feet apart, ignore the row spacing, and thin all lettuce plants to stand six inches apart. Root crops like carrots and beets still can be sown in rows, but plant two or three rows the length of the growing bed. (See Figure 1). Plants like lettuce and radishes can be sown by lightly sprinkling seed over the bed and gradually thinning young plants to their recommended final spacing.
Trellis and Vertical GrowingLots of gardeners use vertical growing to save space in the garden. Caging tomatoes and trellising peas are two familiar examples. Besides saving space, vegetables grown this way are easier to pick and may have less rot because the fruit does not contact the soil. Improved air circulation can even further reduce diseases. Growing plants vertically can mean higher yields per base area. Additionally, vegetable plants can be trained on trellises to provide welcome summer shade to smaller cooler seasonal things like lettuce, spinach, or beets; or privacy screens, as well as to produce food for the table.Trellising does have some disadvantages, however. Climbing supports must be sturdy, especially in windy sites. Building and installing trellises can involve time and expense. If plants are not naturally twining, they will have to be trained or secured to trellises, and heavy fruit will require additional support. Transpiration is higher in plants growing upright, so they may require extra water. Flowers will be more exposed to the wind, which may discourage pollinators like bees, and can cause flower abortion.
Types and InstallationThe type of vegetable determines what kind of trellis used. A wide variety of trellising materials is available. A good rule is to install the sturdiest trellis you can afford. There is simply NO describing the feeling of going outside after a high wind only to find your prize melons pushed over backward on the ground and the vine snapped in two at the base!!
If the trellis is part of your landscaping it should be aesthetically pleasing, too. Posts or supports for trellises can be made from metal, wood or plastic like PVC pipe. Metal posts will last longer and are easier to install than wooden ones. Wooden posts should be treated with a preservative or they may last only one season. The BEST thing in the world I have found are cattle panels. They are about four to five feet high and I connect them with steel posts. Just wire them on and VIOLA! They are cheap and they aren't hard to move around either! Posts can be used to support plastic or string mesh, or chicken wire. (Did I just say chicken wire? No, you did NOT hear me say that! I swore I would never use than evil stuff again... I'd use plain string first... that stuff is awful! It's for CHICKENS... period. Plastic and string meshes can be disposed of, plants and all, at clean-up time. Removing dead plants from chicken wire fencing is frustrating and futile. Longer poles made of bamboo can be arranged in teepees to support climbing vegetables like pole beans. (See Figure 2 for some trellis examples.)
Below are some trellis examples.
You can make a vertical frame of electrical conduit fastened with
slip fittings, or 1/2 inch water pipe with threaded elbow couplings
(detail). Attach strings to support the plants. All trellises or climbing supports should be installed while plants still are small to avoid disturbing the roots of course! Orient trellises to run in an east-west direction, and locate them on the north side of the garden to avoid shading other plants. (unless of course that's your intention!)
You can use slings to support fruit as it develops.
Melons and squashes do not naturally twine and will have to be
trained initially by weaving stem ends through mesh openings.
Developing fruit can be supported with slings made from used
stockings or rags. (See Figure 3.) Insect protection is an extra
benefit of using slings, especially if the entire fruit is wrapped.
Succession Planting
Most gardeners practice a simple succession planting in row gardens by following a lettuce planting in spring with a late crop of, say, beans, or by staggering plantings of beans or sweet corn to ensure a steady harvest. Staggered plantings also work well with lettuce, radishes and other fast-yielding crops. I've even been known to plant lettuce under my corn so it has plenty of shade. Carrots grow especially well this way. Be warned! Succession planting demands careful attention to days-to-maturity for each vegetable you plant, and attention to soil fertility to keep the intensively planted vegetables growing well. Schedule plantings so no area of the garden remains empty for long. Remember that later planted succession crops mature faster than earlier planted ones because growing conditions, especially temperature and light intensity, usually are more favorable. Remove plants once their initial flush of bearing is over. Some vegetables which work well in succession plantings are listed in Table I.
InterplantingInterplanting can be defined as planting different crops in adjoining areas to take advantage of differences in growing habits, light requirements or nutrient needs. A traditional example of this technique is growing beans and corn together. Making plants share space means the individual plants may yield less, but the total garden yield will be greater because the space is being used more efficiently.The number of ways different vegetables can be combined is limited only by your creativity. Remember, it's YOUR garden. If you try something that doesn't work, well, how about that! Write us and let us know what works for you and what doesn't! This is by far my favorite part of gardening... trying new things!! For successful interplanting combinations, plan your garden around the largest, longest-growing vegetable staples like tomatoes or winter squash. Once you've decided their location, plant smaller, fast-growing vegetables around them. In your design, consider the different growing habits of vegetable plants: for example, combine upright plants like caged tomatoes with a scattering of scallions, or grow melons around sweet corn. Interplant lettuce with pole beans; the lettuce will be slower to bolt when growing in the partial shade provided by the taller beans. (See Table II for other possibilities.)
An interplanted garden does not resemble a traditional garden with all the vegetables planted in smart little rows. Rather, interplanted gardens have a mosaic effect with paths oriented around the interplanted areas. Plants can be arranged to take advantage of contrasts in texture and color, making a garden more visually interesting. It is truly a wonder to behold. A common error in interplanting is crowding vegetable plants. Crowded plants yield poorly and are more subject to diseases. Consider the eventual harvest size of the vegetables you interplant, and space them so that at maturity they will just be touching each other. Make the interplanted area no wider than what you can easily reach across to keep from trampling plants. You also can avoid crowding by interplanting fast growing vegetables with slow growing vegetables, for example, radishes or lettuce with tomatoes. By the time the tomato plants are bearing, the lettuce or radishes will be harvested. Or some of the lettuce can be removed in May to make room to sow seed of winter squash. Eventually the winter squash plants will cover the entire lettuce bed. Similarly, vining squash or melons can be sown between trellised pea plants. The pea plants will be finished bearing about the time the melon or squash needs the trellis. Some other interplanting combinations are illustrated in Figure 4.
Figure 4. Here are some interplanting designs. Early: scallions, lettuce, radishes. Later (in dotted lines): tomatoes, summer squash, beets, sweetcorn, pumpkins. A method of interplanting which has received notice recently is known as "square foot gardening." This technique (based on a book of the same name by Mel Bartholomew) involves planting vegetables very intensively. The growing area is divided into square foot sections. In each section, plants or seeds are carefully spaced. For example, in one square foot you can grow 16 radishes, nine beets or one cabbage plant. This technique may be useful for container growing or where space is extremely limited, but will demand correspondingly more attention by the gardener. Follow the usual fertilization guidelines for each crop in the interplanting. Amend soil with compost or organic matter before planting, use a starter fertilizer or compost tea for early spring plantings, and topdress vegetables at the proper stage of their growth. The closer spacing of interplanted vegetables will discourage some weeds. But the weeds that do grow must still be controlled, and rototillers will be too large for the job. Use small tools like onion hoes, or pull weeds by hand. Better yet, use mulches (mulch, MULCH!!) to control weeds; this will GREATLY reduce watering needs. All gardeners can grow vegetables more efficiently by using some of the intensive growing techniques described here. Careful management is the key to successful intensive vegetable gardens. The benefits can include greater yields per square foot, and more attractive vegetable plantings.
|
||||||||||||||||||||||||||||||||||||||
| Home | Garden Monthly! | Newsletter | About Us | Contact |
|
GardenSimply.com | All Rights Reserved 2005 |

Garden Journal !!Subscribe to"Garden Notes" and plan for Harvest Success as you track and record your gardening progress. Your Free Personal Garden Journal includes printable pages making it easy for you to:
Note:Members enjoy regular updates to all our free downloads! |
|
|
|
 |
|
|
|